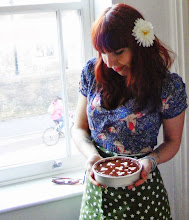
Sometimes in life, you just want a piece of chocolate cake.
Don't get me wrong, I love experimenting with different flavour combinations and ingredients as much as the next vegan girl...but sometimes, I just don't feel like being all that healthy, y'know? There is always a time for chickpeas in cupcakes and bananas instead of fat, but there is also always a time for simple, good old fashioned, no fuss no muss chocolate cake. (Veganized-of course!)
Having said that, this cake is not completely at the naughty end of baking, after all, it's all natural and vegan ingredients with no fat other than coconut. And if you wish, you could still substitute the sugar for agave or maple syrup.
The caramel...well, what can I say? I like my caramel at the naughty end.
So here you are lovelies, a gooey, chocolate cake with a hint of spice to make you extra nice...
Ingredients
Makes a 1lb loaf cake
2 oz Creamed coconut - dissolved in 12 oz water
3 floz Coconut milk
2 oz Cocoa powder
7 oz Self raising flour
1/2 tsp Baking powder
3 oz Date paste - see below for instructions
Large pinch of salt
1 tsp Espresso powder
2 1/2 oz Brown sugar
Splash of vanilla extract
Large pinch of cayenne pepper
1/2 tsp Ground cardamon
1 Batch of salted caramel - see below for instructions
Date Paste
Measure out the 3 oz of chopped dates, then pop them into a saucepan with a few tbsp of hot water. Now simmer them on a gentle heat for a few minutes until they're soft and mushy. You can use a hand blender to blend them into a smooth paste.
Add a small pinch of salt and a drop of vanilla extract. This is like a very simple date caramel - it tastes sooo good! DON'T EAT IT ALL NOW!
Caramel
This is the simplest caramel recipe ever, it's my go to caramel.
All you need is 1 can of full fat coconut milk, 3 oz brown sugar, a pinch of salt and a splash of vanilla extract.
Simple pour the coconut milk into a pan with the sugar and heat through gently until the sugar has dissolved.
Then turn up the heat so it's on a rolling boil BUT NOT SO THAT IT'S RISING UP TOO MUCH. Keep it merrily boiling away until it reduces down and becomes thick and gooey. Depending on how high a heat you have it, it can take from 30 minutes to 1 hour. Give it a stir every now and then.
When it's thick, beat it with your wooden spoon for minute, to make it shine and then beat in the vanilla and salt.
Right then, lets get baking!
First off, pour your 12 oz of hot water into a jug and add the creamed coconut. Let it sit for a minute and give it a stir and it'll dissolve. Set it aside someplace cool.
Now grab your favourite mixing bowl and sift in the flour and cocoa powder.
Add the baking powder, salt, espresso powder, cayenne pepper, cardamon and sugar. Give it a stir with your trusty wooden spoon.
Once the creamed coconut mixture has cooled a little - it can still be warm just not boiling hot - pour it into the dry ingredients. You'll need to stir well but gently, until most of the lumps have gone.
Now pour in the coconut milk and date paste and stir until combined and you have a thick, glossy batter.
At this point you are going to have a sneaky taste test - you just won't be able to resist because the smell is too chocolatey - the danger here is that you might eat the entire mixture. So be careful.
Use coconut oil to lightly grease your loaf pan and then dust it lightly in cocoa powder.
Pour the batter in and bake it at 180 c for about an hour. The time can vary with different ovens, I suggest after 40 minutes using a cake tester or knife to check, you want the knife to come out pretty much clean, but a little bit of cakey goo is good because that means it'll be nice and gooey soft.
You can remove the cake from the loaf pan after a few minutes and let it cool on a wire rack, preferably on a window sill to make people jealous.
Once cool, simply smother in caramel, sprinkle with salt and devour.
Happy Sunday baking! x


3 comments:
Good lord this looks so good!
OMG. What a cake!!!
Just discovered your lovely little website through Keepin' It Kind, and I'm so glad I did! :)
OMG. What a cake!!!
Just discovered your lovely little website through Keepin' It Kind, and I'm so glad I did! :)
Post a Comment